
Hi! I’m Tam from Sew Dang Cute Crafts.


I love the different headbands that everyone wears these days, especially for little girls. I’ve wanted some for my daughters for a long time, and I’m so excited to be here today to tell you that I finally made some for them.
![Three-Headbands_thumb[1]new](http://www.theribbonretreat.com/blog/wp-content/uploads/Three-Headbands_thumb1new.jpg)
It all started with these darling 3” Pom Posy flowers.
These beautiful flowers are only $1.70! And the 2″ Pom Posy is only $1.35!
![Pom flowers_thumb[2]new](http://www.theribbonretreat.com/blog/wp-content/uploads/Pom-flowers_thumb2new.jpg)
The first headband I made was a black metal headband.
![Finished-metal-with-flower-headband_thumb[3]new](http://www.theribbonretreat.com/blog/wp-content/uploads/Finished-metal-with-flower-headband_thumb3new.jpg)
Supplies:
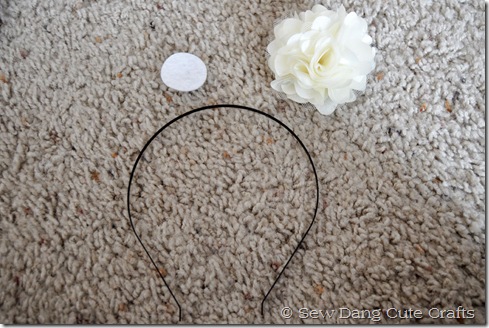
* A Metal headband – bended end – $0.65
* Felt circle – Felt Circles are 10 precisely cut circles sold in two sizes – 1 1/4″ and 1 3/4″
* Hot glue
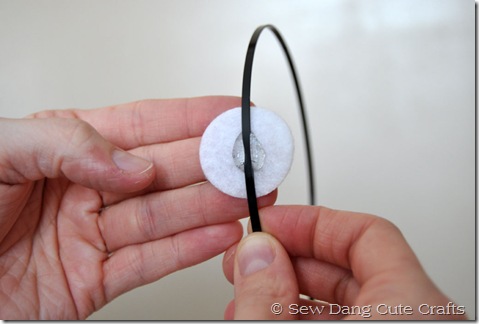
STEP ONE: Place a bead of hot glue on the felt circle and glue it to the metal headband.
STEP TWO: Take the flower and glue it to the headband/felt circle.
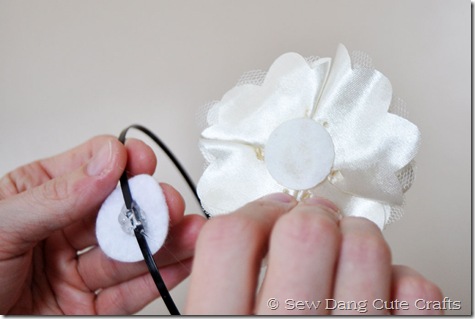
All done!
![Finished-metal-headband_thumb[1]new](http://www.theribbonretreat.com/blog/wp-content/uploads/Finished-metal-headband_thumb1new.jpg)
Pretty easy, huh?
Next I made an elastic headband.
![Finished-elastic-headband_thumb[1]new](http://www.theribbonretreat.com/blog/wp-content/uploads/Finished-elastic-headband_thumb1new.jpg)
Supplies:
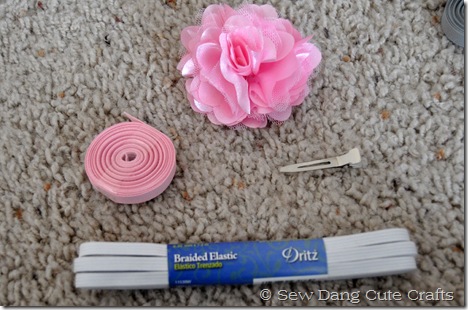

* 1/4” elastic – The Ribbon Retreat also carries Skinny Elastic.
* 3/8” Grosgrain Ribbon– If you aren’t sure of the ribbon color, at the time of your order
comment to have them choose the best color match to your flower.
STEP ONE: Cover metal clip with ribbon.
The Ribbon Retreat carries a wide selection of barrettes and clips.
These Single Prong Clips are only $1.40 for 20.
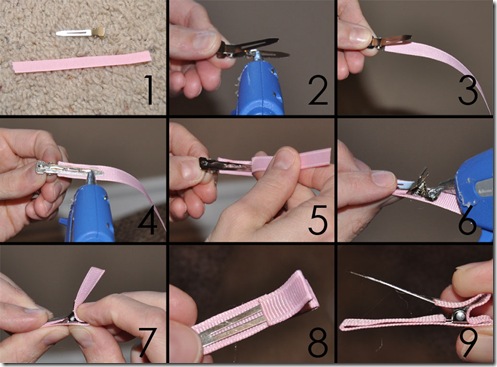

1. Cut piece of ribbon about 3 times the size of the clip.
2. Open clip and place some hot glue on the inside of the clip.
3. Cover the glue with ribbon.
4. Flip clip over and place some hot glue on the back side of the clip.
5. Fold ribbon over and glue in place.
6. Place a dot of hot glue on the inside tabs of the clip.
7. Push the ribbon in to glue in place.
8. Fold the remaining piece of over and glue in place.
9. Finished clip.
The Ribbon Retreat also has a video tutorial on How to Line a Clip.
Click on the link to view the video.
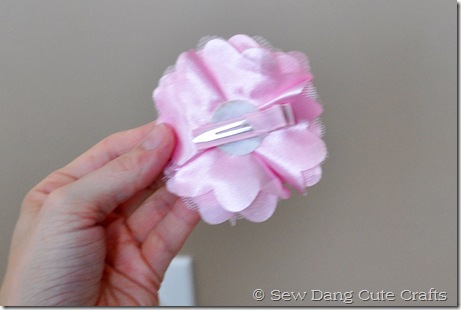
STEP TWO: Place some hot glue on the bottom of the flower, and glue the clip to the flower.

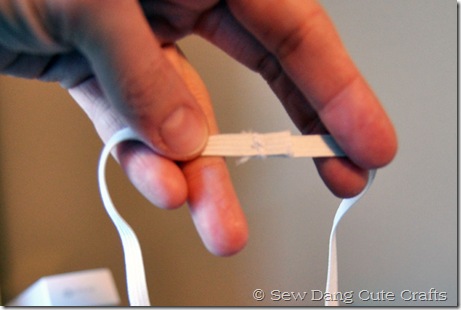
STEP THREE: Cut a piece of elastic about 1” smaller than the size of child’s head. Stitch two ends together.

STEP FOUR: Clip finished flower to elastic headband.
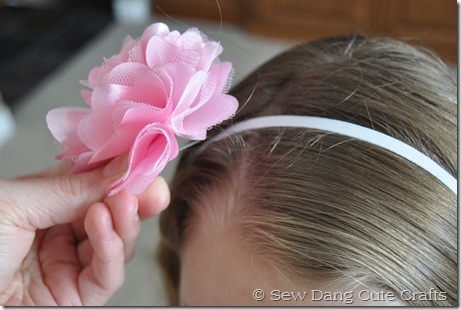

Tada!
![Finished-elastic-headband_thumb[1]new](http://www.theribbonretreat.com/blog/wp-content/uploads/Finished-elastic-headband_thumb1new.jpg)
![Finished-elastic-headband_thumb[1]new](http://www.theribbonretreat.com/blog/wp-content/uploads/Finished-elastic-headband_thumb1new.jpg)
![Finished-elastic-headband_thumb[1]new](/blog/wp-content/uploads/Finished-elastic-headband_thumb1new.jpg)
The last headband I made was a ribbon-covered one.
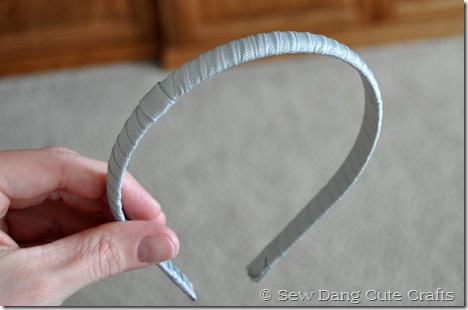

For this one I started off with these 1/4” plastic headbands. Then used grosgrain ribbon (again requesting to have the color that best matched my flower) and this How to Wrap a Headband with Ribbon video tutorial to cover the headband.
Once the headband was covered, I simply clipped my flower in place on the loop.
![Finished-ribbon-wrapped-headband_thumb[1]new](http://www.theribbonretreat.com/blog/wp-content/uploads/Finished-ribbon-wrapped-headband_thumb1new.jpg)
![Finished-ribbon-wrapped-headband_thumb[1]new](/blog/wp-content/uploads/Finished-ribbon-wrapped-headband_thumb1new.jpg)
Pretty slick, huh?
I love that I have so many choices now with headbands!
My girls sure are excited about it too!!!
![DSC_0747_thumb[1]new](http://www.theribbonretreat.com/blog/wp-content/uploads/DSC_0747_thumb1new.jpg)
![DSC_0747_thumb[1]new](/blog/wp-content/uploads/DSC_0747_thumb1new.jpg)
Thanks so much for having me here today!
I hope you will stop by and say “hello” over at Sew Dang Cute Crafts!


These Pom Posy flowers are so beautiful and at these prices, you can have one in every color!
Many thanks to Tam for her wonderful tutorial!
Make sure to visit her blog for lots of fun stuff!
If you have great tutorials and a fun idea you would like to share on The Ribbon Retreat Blog,
please submit a project.
Have a great day!




8 Comments
Visiting from your blog, Tam….and these turned out soooo cute! Nice job
These are darling Tam!! I love how pretty they are for Spring!!
I love the look, but I wish “The Ribbon Retreat” would only show the colors that you offer. The color of the flower on the little girl with the headband is not a flower color that you sell. I wish you did, great color.
Hi Tami! The flower color on the girl is Grey and we do sell it. All products in our tutorials are from The Ribbon Retreat. It may look a little different in color due to lighting when the picture was taken. I hope this helps! Have a great day!
I was wondering if you still carry the 1/2 inch solid grosgrain ribbon that is needed to line the metal clip? When I go to the link for the ribbon, that size is not available. Thank you.
Hi Valerie! That should read 3/8″ ribbon. Thank you for catching that! I will edit the post to make that change. You should find that size available in solid grosgrain on our site. Thank you! – Shirley
Very good instructions! One question, where do I place the flower on the headband? I’m making this “long distance” so I don’t have the child here to figure out where on the headband to put the flower. About 4 1/2″ up from the tip, or where?
Hi Lori! Thank you for your question. You can basically put the flower wherever you prefer on the headband. I typically like to put the flower more on the side like Tam does in this tutorial. However, I have been know to put the headband on myself first to try to get a good flower placement. The headbands never look as good on me as they do my little girl though. I also have had good luck with find someone of similar size to model the headband on for a good flower placement as well.

I hope this helps! Good luck and have a wonderful rest of your day! Michelle